Showing posts with label The Extra Things. Show all posts

Monday, 12 September 2011

Week 13, Extra Thing: QR Codes

Before we get onto this week's Extra Thing, just a reminder about our wrap party next week! It's at the Museum of Classical Archaeology (upstairs in the Classics Faculty building, Sidgwick Site) on Thursday 22nd September from 5.30pm. If you're coming and you haven't already done so, please could you email me at aj390@cam.ac.uk or fill in this form to let us know for catering purposes!

Now onto our final Extra Thing - QR codes.


What is a QR code? 

I'll let Wikipedia explain this one: "A QR code (abbreviated from Quick Response code) is a type of matrix barcode (or two-dimensional code) designed to be read by smartphones. The code consists of black modules arranged in a square pattern on a white background. The information encoded may be text, a URL, or other data."

So if you have a phone with a camera and the ability to download a free QR reader app (e.g. QR Code Reader and Scanner for the iPhone or QR Droid for Android) you can take a picture of a code like the one above, and be taken directly to the URL or the message that the code links to.

What can I use it for?

QR codes are appearing all over the place nowadays. On billboards, TV cookery shows, note paper, CVs, and yes, in libraries. As an example of how they can work in an academic library setting, the University of Huddersfield have started using QR codes throughout their libraries "to deliver library instruction and help at the point of need". These link to electronic copies of materials in the catalogue, mobile-friendly versions of instruction videos, floor plans, handouts etc.

Okay, how do I make one?

Searching for "QR code generator" brings up a variety of options. I've used Kaywa QR code generator which works well, but most will work in much the same way. You can choose whether you want your code to link to a URL, a message or phone number, choose the size and then click "Generate!" You should then see this:

You can then copy the image into the document you are working on. Simple!

Now how do I make it look good?

Let's face it, QR codes aren't the most visually appealing thing to stick on those beautiful library signs you spent an hour lovingly crafting. Geeks like me might be rather fond of their blocky, pixellated style but even I'll admit that one QR code looks much the same as another. Never fear! Although most codes you see are the standard black blocks on a white background, they can in fact be customised quite a bit.

Firstly, they don't have to be black and white. As long as the background is lighter than the code and there is enough contrast between the two, you can make your QR code whatever colour(s) you like. You can do this yourself with something as simple as MS Paint, or there are web apps such as http://rasoftwarefactory.com/qr-generator/ that will let you customise colours etc. when generating the code.

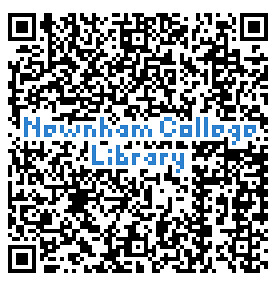
Secondly, designs can be built into the code itself. On a fairly simple level, http://vanity-qrcode.com/ will generate a personalised QR code incorporating words or numbers of your choice. I used this to made the Newnham College Library code on the left, which links to our library website.

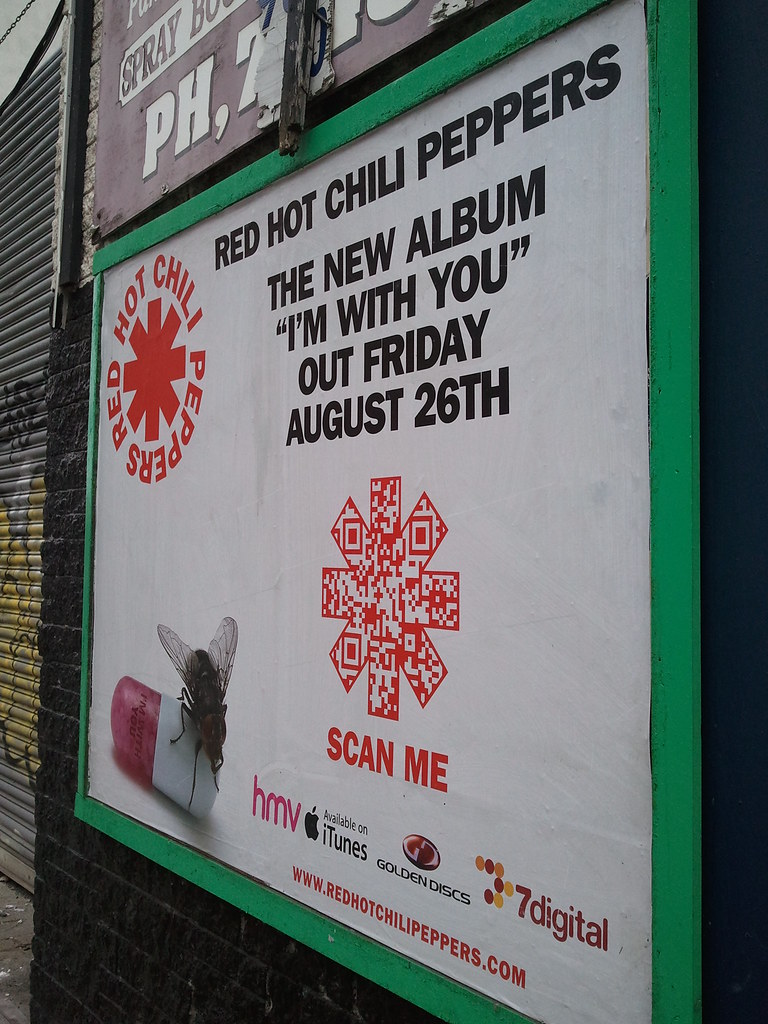
RHCP QR code by Annie_Bob on Flickr
Some brands are getting really creative with the QR codes they are using in their marketing. A Mashable article from April this year gives some great examples of designer QR codes, and I recently spotted the one on the right "in the wild", where the code is incorporated into the Red Hot Chili Peppers' logo.

What to do for this Thing
  • Think about how QR codes could be used in your library. What are the benefits and the drawbacks?
  • Have a go at generating a code of your own. Unfortunately you will only be able to read it if you have a phone with a barcode reader (e.g. QR Code Reader and Scanner for the iPhone or QR Droid for Android), but try and get someone to read it and test it out.
  • If you're feeling fancy, try making a personalised code!
Extra Reading

Monday, 15 August 2011

Week 9, Extra Thing: Creative Commons

Fuss-free flickr attribution

So exploring flickr has given you an appetite; you've picked out some fantastic flickr images and they're all ready to adorn your blog posts. All you need to do now is add the images, cite the author, its title, details of where you found it, a link back to the source, and if it's a Creative Commons image you'll need to provide information detailing whether the content can be reused or remixed.

That's a lot of fuss for one image- thankfully there is an easy way to do this!

Lost by Stéfan, on Flickr
Creative Commons Attribution-Noncommercial-Share Alike 2.0 Generic License  by  Stefan 


If you are using Creative Commons flickr images regularly then you might want to bookmark ImageCodr, it'll save you so much time as well as making your attributions nice and neat. Simply find a Creative Commons image on flickr, copy the URL (Tip: click right through to the image, entering a URL for a set or member won't work) and paste it into the Get code! tab of ImageCodr.

ImageCodr reads the licence assigned to flickr images and pops out a handy chunk of HTML linking to both the image and the appropriate licence.


The HTML code will change depending on the size of image you wish to embed. Then it's just a case of pasting the code into the HTML editor of your blog and watching as your chosen image and the correct licence and attribution details appear. Voilà- just like the picture above. Clicking the name hyperlink brings you to the creator's flickr page and a click on the license symbol reveals the full Creative Commons licence which explains exactly what you can and can't do. Neat and, er, neat too.

This is a share-alike license which means that although you are free to adapt, change, remix or alter the work you must license the work in a similar manner. This means if you were to re-colour, or add extra images to the picture you couldn't pass it off as your own work or stop other people from using it and adapting it in their own way. Additionally, you may not use this image commercially, or Darth Vader might have something to say about it!

”Say hello to my new puppet!” by Stéfan, on Flickr
Creative Commons Attribution-Noncommercial-Share Alike 2.0 Generic License  by  Stefan 

Don't be afraid of using Creative Commons licensed content, it's been licensed to encourge use. I license my content because I want people to reproduce it in an appropriate way, simply by attributing it correctly. In fact some sections of this post I've taken from an article I wrote last year, which is covered by a Creative Commons licence.

You can find out more about Creative Commons licences, including how to get one for your own work, on their website. This also hosts a handy Creative Commons search covering flickr, Wikimedia Commons and Google image search, amongst others.


Extra Credit:

Creative Commons images and you: a quick guide for image users- Ars Technica
Remixing with YouTube Creative Commons Content- YouTube help

Monday, 8 August 2011

Week 8, Extra Thing: tumblr and posterous

Blogophobia: fear of blogs and blogging.
Her blogophobia was a kind of online stage fright: what if someone actually READ what she had to say?

I used Urban Dictionary to self-diagnose this last year during 23 Things. It all started when I tried to make my post on RSS feeds interesting. After staring at Blogger's blank, white, empty content box for a full four and a half minutes I couldn't even summon a vaguely witty title. Fear struck! My palms began to sweat. Just when I was about to file myself under a rock and die of librarian blog-related shame I remembered that it doesn't have to be this way.


tumblr- for truly fearless blogging


I feel that whereas Blogger and Wordpress demand words with menaces from me, tumblr has a lighter, more cajoling touch. It handles posts consisting of mainly images, video, quotations or audio as easily as text, and subtly adjusts the parameters to suit.

tumblr navigation- effortlessly simple

The drafting area is simple, uncluttered and encourages you to write naturally, but the biggest thing about tumblr is that it isn't about the big posts- it's about documenting things as they come. Don't get me wrong, I've written some detailed posts on there, but it is so quick and easy to post that I find myself more inclined to share my snapshot view of the web wherever and whenever I can.

tumblr is often described as blogging lite, or halfway between a tweet and a post. Although these definitions only tell part of the story, they do highlight the immediacy of tumblr.You can set up your blog with minimal faff- the only hold up is coming up with a suitably trendy name! A range of tools and extras means that you can send your posts by email, clip them from the web and even telephone them in (should you wish). Innovative and easy ways to post are also available for smartphones.

Where the wild things are?

tumblr does have a reputation as being the home of the hipsters and Harry Potter obsessives, but it is also a genuinely creative space. Users can choose from over a 1000 themes, customise the CSS or create from scratch, this freedom and flexibility is great for experimenting with bits of code, and there are scores of helpful people who can teach you neat tricks with javascript, JSON and other scary words.

What really sets tumblr apart is the social dimension, as well as actively creating your blog you can follow others receiving updates straight to your dashboard. Not quite a Facebook or a twitter feed, this has a true community feel as you are encouraged to reblog (a bit like retweeting) each other's posts. Some big players have also joined in the fun, taking the opportunity to share quickly and efficiently- The New York Times and the Washington Post host their respective style sections here, and the New Yorker's tumblr looks enviably good.

Librarians on tumblr

Join the growing librarian community on tumblr, including our very own Annie, have some fun and mix it up with Cambridge Noir exploring the fictional dark side of town and the truly bizarre experience that is Garfield minus Garfield.


posterous at Judge Business School


Fuild icon for Posterous by dolphinsdock, on Flickr
Creative Commons Attribution-No Derivative Works 2.0 Generic License  by  dolphinsdock

Our posterous was set up in minutes one afternoon in May, it was intended to support a course in New Media aimed at a small group of research students. I had two requirements: first to act as a paperless handout detailing all the tools we planned to showcase, secondly I needed to host video content and key links to be accessed during teaching. Despite our advertising only running to "key cjbsinfo posterous into Google" we reached almost 200 views in the two weeks following the course.

Subtly social

An unexpected strength of posterous is how adaptable it is to group work. At set up you can choose whether to opt for a completely private blog (ideal for family or group newsletters) which acts as an email list with extra knobs, bells and whistles, or a public blog, but whatever you choose it's easy to add extra authors at any stage. This and the ease with which you can import a blog is where posterous has the edge over tumblr. I set up a group tumblr for my bookclub and found it disappointingly faffy.

The final results aren't as impressive as tumblr, but there are people out there using it for educational purposes- try BBC Earth or Scott McLeod's Mind Dump, and if I was setting up a group blog it would be my first choice.

Extra Credit

Comparing Tumblr and Posterous- 40tech

Tumblr: An Introduction Guide For Microblogging – Part1-1WD.CO

HOW TO: Get Started on Posterous- Mashable

Monday, 18 July 2011

Week 5, Extra Thing: Dropbox

How many times do you email a document to yourself to transfer it from work to home?

Or look at the various versions of a document on your hard drive and USB drive wondering which one is the most current?

Or want to send a photo or video to someone and find that the file is too big to email?


Google Docs are a great way to share documents with others - or to access the same material from different computers but sometimes you want to keep your file formatted exactly as it is.

This is where Dropbox can be useful. It provides you with a secure online storage space so that you can share files and access them from different machines.


Getting started with Dropbox

1. First step is to go to the Dropbox website, set up an account and download the program, ideally onto each of the machines that you use regularly.
Once downloaded, the little blue Dropbox icon sits in the taskbar at the lower right-hand corner of your screen. You will also see a My Dropbox folder sitting among the folders on your machine. (By default it places itself inside the My Documents folder but you can move it.)

2. Drag or save folders or files into this Dropbox folder just as you would any other folder.

3. Now go to another computer. If it has Dropbox installed, log in and you'll see your files in the My Dropbox folder. If it doesn't, log into the Dropbox website and the files are there.

If you change the file, it's automatically updated for wherever you next look at it.
You can also use Dropbox on various mobile devices.

Sharing files with Dropbox

There are two types of sharing - using shared folders and using the public folder.

Shared folders
You can invite other Dropbox users to join a shared folder, much as you would share a Google Doc. If one person changes a file in the shared folder, everyone sees the updated file.

Using the public folder
If you want to share a file with someone who doesn't have a Dropbox account, you simply put the file into the public folder, right-click and then click on 'Copy public link'. This gives you a URL that you can post into an email to share the link.

I find Dropbox pretty easy to use. I like having an online backup for the files that I'm working on currently and it's a handy place to save back-up copies of presentations. But I mostly use it in the library as part of our image supply service. We supply digital images to publishers that are far too large to supply via email so nowadays we mostly use the Dropbox public folder.

I have a couple of gripes about it - that each individual file has to have its own public link (so 5 photos means 5 links to click) and sometimes our customers have trouble opening the links. My biggest gripe is that it's not as good for file-sharing as the much-missed drop.io

My other major gripe about Dropbox is the relatively measly 2GB limit for a free account. If you're sharing photos or videos, that's not a lot. One way to increase your limit for free is to refer others to Dropbox. So if you are installing it, do so via this URL. That way you and I both receive an extra 250MB of storage.

I'd be interested in the comments to hear about other library uses...

Monday, 11 July 2011

Week 4, Extra Thing: Using the Library Widget

So many libraries, so many books. How do you keep track of them all? Newton very helpfully sends out emails before (and after!) your books are due but it's good to have some additional reminders to stop those fines from mounting up.

The nice people at the UL have created the Cambridge Libraries Widget to make it easy to keep track of all your loans. You can embed the whole widget into your iGoogle page, Facebook, CamTools or into any webpage (perhaps your library's?). It gives you a Newton search window and the ability to manage your loans, renewals and requests.

Embedding the widget into your iGoogle page is as simple as pressing a button on the Widget page.

But seeing your loans still means logging into the Widget. It might be more helpful to have them inserted directly into Google Reader or your Google Calendar which you'll probably look at more regularly.

How to view your loans in Google Reader

1. Make sure you're logged into Google.

2. Log into the Library Widget. You can find it embedded in many DepFac and College library webpages. For example, go to the English Faculty Library webpage. Click on the tab on the righthand side called 'Library Accounts and Renewals' and log in.

3. Choose the Feeds tab and click on the first link 'RSS loans feed'. It will offer you the option of adding the loans feed to your iGoogle homepage or to your Google Reader.

How to view your loans in Google Calendar

1. Open your Google Calendar.

2. Log into the Library Widget (as instructed above).

3. Choose the Feeds tab and right-click on the second link 'iCal Calendar Feed'. Choose 'Copy link location'.

4. Go to your Google Calendar and open the 'Other calendars' section on the lefthand side. Click 'Add' and choose 'Add by URL'. Paste the iCal link in the box and press 'Add Calendar'.

5. You can use the 'Settings' feature under 'Other calendars' to rename or otherwise customise your calendar.

Extra Extra Thing

Take a look at the Libraries@Cambridge calendar which brings together all manner of library calendars. You can copy feeds or individual events from it to your own calendar.

Monday, 4 July 2011

For those old hands...

There's no extra Thing this week, but please take a bit of time to read the other blogs and encourage those new to the programme this year. Your comments and any advice will be really appreciated I'm sure. We'll have a new Extra Thing for you next week!

By Rickydavid on Flickr

Monday, 27 June 2011

Week 2, Extra Thing: Twitter, extended!

This week's Extra Thing is really several things - third party Twitter applications and clients. These tools or add-ons complement your Twitter account and add extra functionalities which can be extremely useful. Here are a few handy ones, but there are many more out there!

Applications
  • Twitterfeed - sends a tweet every time you publish a new blog post.
  • Future Tweets - allows you to schedule tweets to go out at a specified date and time.
  • The Archivist - creates graphs about tweet volume over time, top users, top words used etc. Despite the name it doesn't create a full archive of your tweets.
  • Twapperkeeper - creates archives of tweets. You can create 2 free archives, if you want more you'll either have to delete one or pay.
  • Twittermail - update your Twitter status by email.
  • Bit.ly - not really a Twitter application, but if you paste a URL into the box, it pops out a shortened URL such as this one - http://bit.ly/jYjYDS - which is a short URL for this blog. If you use shortened URLs in your tweets then it saves on precious characters!
Clients
Twitter clients make it easier to manage more than one Twitter account at once. (Great when you have a library and a personal account!) Most also allow you to schedule tweets, and automatically shorten URLs
  • Hootsuite - Comes in browser and mobile versions. Multiple tabs make it easy to keep track of several Twitter accounts at once (and Facebook, LinkedIn, Foursquare and a few other social media sites). Can also have multiple contributers to accounts without sharing passwords - could be useful for library tweeting teams!
  • Seesmic - comes in browser, desktop and mobile versions. As with Hootsuite you can add other social media accounts besides Twitter.
  • Tweetdeck - desktop and mobile client (browser version for Chrome only - but with a limited beta testing version for other browsers). This client is now owned by Twitter, so if you want the official endorsed platform, give this a try!
Try out one or two of these, or google "twitter apps" and see what else you can find!

by IconEden on IconFinder.com

Tuesday, 21 June 2011

Week 1, Extra Thing: Ways to make your blog beautiful

You have just created your first blog.  Congratulations!  It is likely, though, that you are not completely satisfied with how it looks.  You might wonder how to make it look interesting and professional, like some of the more established library blogs.

Do not worry, you do not need great coding or design skill to make a nice-looking blog.  Blogger (and Wordpress) offers many templates and gadgets/widgets that add sparkle to your blog and extend its functionality -- and most are easy to install and configure (and free!).

Quick definitions: A template controls the layout, colors, and overall look and feel of your blog.  In Wordpress, these are called themes.  A gadget (or widget) is a snippet of code that you can copy and add to your blog and which adds functionality to your blog, such as a feed from your Twitter account, a connection to your Facebook account, or slideshow of your photographs.  There are literally thousands of themes and widgets to choose from.

To change your template on Blogger, follow these instructions.  If you would like to customise your template, you can use the template designer.

There are also many third-party Blogger templates to choose from.  A Google search for 'blogger templates' yields many sites with many interesting designs.  It is important to choose a template that reflects your personality and goals.

To add a pre-loaded gadget to Blogger, click 'Design' and then the 'Page Elements' tab.  Any place you see the link 'Add a Gadget' you can click to add one of 24 gadgets Blogger provides by default.  Some of these gadgets include a search bar, a 'follow me by email' feature, and an easy way to add an image.

For lists of other great widgets, a Google search for 'blogger widgets' yields many great sites.  If you find a widget you would like to add, copy the given code snippet, go back to your blog and 'Add a Gadget' (instructions above).  Select 'HTML/JavaScript,' paste the code snippet, and save.  Your new widget/gadget should appear on your blog.

Have fun exploring the many ways you can improve the look and functionality of your blog.  Change your template at least one time and add at least two widgets.  You will be surprised at how easy it is!