Monday, 8 August 2011

Week 8, Thing 14 : Facebook

This week we are looking at social networking sites with Facebook and then thing 15, LinkedIn. Unless you have been living in isolation for the past few years, then I am sure you will have heard of Facebook even if you don't use it.  According to their website it now has over 500 million active users and you may have a personal account already, especially if you graduated in the last few years.  It is a an easy place to share information and photos with friends or colleagues. If you want to create a personal page then connect to Facebook and follow the sign up procedures.  For this thing I am going to be concentrating on how you might use Facebook in your library rather than personally.

Should libraries be on Facebook?
In the past there has been debate over whether libraries should be on Facebook as it is seen as a social space.  In 2009 Katharine Widdows from Warwick libraries published an article called "In your Facebook, not in your face" on the reception of their facebook page, which was supported by the students.  For some years now Facebook has allowed the creation of pages for businesses or organisations and it has become a major marketing tool.  It could be argued that libraries should promote their services where their users are and if that is on facebook then the library needs to be there.  Unless libraries choose to pay for marketing then it is a passive presence. Your page is there and if your users want to follow you they can.  

How are libraries using Facebook?
If you have a facebook account and search for "libraries" you will see the collection of groups and pages set up by libraries from a range of sectors and countries.  Libraries are using facebook for a variety of reasons including :
  • Advertising events
  • Promoting new or existing services
  • Tie ins with special days e.g. Valentine's day or anniversary of Shakespeare's birthday
  • News updates on closures, borrowing, electronic access etc
  • Links to articles of interest to the library users
Check out some of the examples below (you don't need to have a Facebook account). You will see that both the look and styles are very different.  You can be as creative as you want.

Orkney Libraries and Archive
Green Library Stanford
The Open University
Essex Libraries
University of Worcester ILS
Swansea University Library and Information Services
De Montfort University Library  (access to subject guides etc from left hand toolbar)

Some Cambridge Pages:
MML Library
Pembroke College Library
English Faculty Library
Judge Business School Library Services

Instructions on setting up a library page
Now you have been inspired by the pages you have viewed, you may want to set up a library facebook presence.  A few warnings.  Once set up remember to go into the edit page to check your settings are what you want.  Privacy is not such an issue on fan pages, more to do with whether you want people to be able to post to your wall or whether you want to restrict it to just you.  Remember that facebook is constantly changing its layout and settings.  For example, organisations used to have a group page but now groups are less popular and fan pages are used.  If you make a lot of changes to the appearance of your page this may have to be redone when new layouts are introduced centrally.

So here is what you need to do:

1.  Connect to facebook and on the opening screen ignore the sign up boxes and go down to the bottom right and click on "create a page for a celebrity, band or business" - that is you! 

2.  You are then given a number of options to choose from.  Select company, organization or institution (or whatever you think is most appropriate). 

3.  Depending which option you chose you will get offered slightly different boxes to fill in.  I will follow through with the company, organization or institution option.  You are asked to choose a category and then a name.  For category you might choose education or university.  Then enter your name. This will be the title of your page so think carefully how you want to be represented. Then click on "get started".

4.  You are then asked if you have a facebook account already and if not you are asked to create one.  For our library page we used our library email address rather than a personal one to create the account. You may want to decide how you want to register the page so that it may be maintained even if staff leave.

5.  Nearly there now.  Next you are asked to upload a profile picture.  This can be changed later if you haven't got any good pictures to hand.  All pages now have space for 5 pcitures on the top so make sure you add some later.  Once uploaded continue onto the next page where you are given options to collect some fans straight away.  There is also a box to share the message on your wall, untick this
if you linked to a personal account and continue.

6.  Enter your library web address and write a few things about your library so that potential fans will be able to identify your library.  Continue through for your page.  The page will give you more options for gaining fans and in the top right is the edit page button if you want to change any settings or delete the page.  In the toolbar on the left you can click on "wall" to start posting to your page. 

7.  Finally you just need to make sure you keep posting information and you let your users know you are out there.  Once you have 25 fans you can go into "edit info" under the title of your page and choose a username.  This then provides you with a shorter, more memorable url for your page. So why not get some of the Cam23 people to become fans and then when you have enough you can get a shorter url for publicising to your library users.  

What now?
Time to blog about thing 14.  You may want to blog about your own library page and its benefits or the pros and cons of having a page.  Perhaps you are setting one up and you could blog about what you hope to get out of it.  Or just blog about some of the pages you have found and why you like them or what you would have liked to have seen on them.  

If you are stuck for ideas on what to put on your facebook page try the following article on 25 Great Facebook Page content ideas.  It is aimed at business but there are some good general tips.  Another interesting article is on the growth of Facebook-commerce and how the platform is being used to sell stuff.  Perhaps a future option for library merchandise or subscription services?

Monday, 1 August 2011

Week 7, Thing 13: LibraryThing

Welcome to Thing 13!


After completing Thing 13...


You will have explored LibraryThing and understand how it can be used by libraries, and you will have created a LibraryThing account and added some books to your catalogue.


What is LibraryThing?
LibraryThing is an online resource, which allows users (libraries and/or individuals) to easily catalogue book collections, add reviews and interact with other users who have the same books and interests. LibraryThing was launched in August 2005 and currently has over a million users and over 61 million catalogued books. The resource is free to use for the first 200 books and then a small donation (suggested $10 per year or $25 for life) is required.

How does it work?
You can add a book to your LibraryThing catalogue by entering the title, author or ISBN. LibraryThing then searches a number of online sources (including Library of Congress, 690 library catalogues and Amazon) and retrieves the book's data. This data can then be edited e.g. if you want to add your library's shelfmark number.

How can libraries use LibraryThing?

  • Small libraries can use LibraryThing to catalogue their collections, removing the need to invest in a more expensive piece of cataloguing software.
  • Libraries can create a LibraryThing widget to display new or featured books on their website.
  • Libraries can integrate LibraryThing data (tags, recommendations, reviews etc) into their existing catalogues. (A list of libraries that have already integrated data is available here.)


Some background reading


1. Read Social networking for bookworms and LibraryThing and the library catalog: adding collective intelligence to the OPAC.


2. Look at the following examples of libraries using LibraryThing:


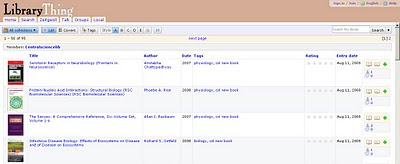
Central Science Library (Cambridge)


Nuffield College Library (Oxford)


Step-by-step instructions: Creating an account
1. First of all decide whether you're going to create a personal LibraryThing account or one for your Library. (It's probably wise to consult with colleagues also on the Cam23 programme as to who will have the honour of creating your Library account otherwise you may end up with multiple LibraryThing personas!)


2. Go to the LibraryThing website and click on 'Join Now'. Enter the username (member name) and password you want to use and select either 'personal'or 'organization' as the type of account. Although it's optional, LibraryThing advises that you also enter an e-mail address as this makes it easier to retrieve your password if you forget it. (N.B. If you do enter an e-mail address you can edit your profile to hide this from view.) Click on 'Join Now' again.


3. On the next screen you'll see an image of a book cover and you'll be asked to enter some information from the cover to confirm that you're a real person and not a machine - a LibraryThing version of verification codes! Your LibraryThing account will now have been created and you should be on your 'Home' page.


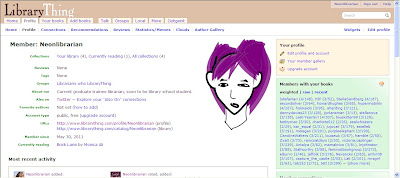
4. Next edit your LibraryThing profile. Under 'About you' you could enter a mini biography, your location and your Twitter ID. You may also want to add a photo (under 'Pictures'), choose to hide your e-mail address and opt not to receive automated e-mails from LibraryThing (under 'Account settings'). All of the fields are optional so you can enter as much or as little information as you wish. N.B. Remember to click on 'Save changes' on each page ('About you', 'Account settings' etc) otherwise you'll lose the information you enter. Once you've finished editing, click on the 'profile' tab to see how it looks.


5. Now we're ready to add some books to your account. Click on the 'Add books' tab (beneath the LibraryThing logo in the top left of the screen). Enter a title, author or ISBN into the 'Search' box and then click on 'Search'. A list of matching books will appear on the right hand-side of the screen. Simply click on the title of the correct book to add it the library you're building. (N.B. If the book doesn't appear in the list, you'll need to enter it manually. Click on the 'Add manually' link beneath 'Other options' at the bottom of the page and enter the information that you have.) Once you've added a few books to your library, click on the 'Your books' tab to see a list of them.


6. We'll now edit the books' information by adding tags (subjects), further bibliographic information, reviews etc. Click on the title of one of the books in your list and then on the 'Edit book' link on the left hand-side of the screen. Add any additional information that you wish to and click on 'Save'. Repeat for the other books in your library as appropriate.


7. Blog about LibraryThing! What are your thoughts on LibraryThing? Do you think it could be used in your library? Do you know any other libraries already using LibraryThing?


Further reading


A short introduction to LibraryThing


LibraryThing for Libraries

Week 7, Thing 12: Bookmarking tools

Ever had the frustrating experience of bookmarking a webpage on your computer, only to find the next time you want to access it that you are on a different computer? This is where online bookmarking tools come into their own - here is a whistle-stop tour of a three bookmarking tools.

Delicious

Perhaps the best known is Delicious . Delicious has undergone a period of change in the last year. At one stage it looked as though Yahoo might close the service down. In fact another company AVOS has taken it over. Therefore anyone who had an account prior to 31st July 2011 needs to re-register to the new service or risk losing their bookmarks. (Hopefully this won't have an effect on this blog entry, as naturally I had to write it prior to the August 1st changeover!!). To see what can be done with Delicious it is worth reading this brief overview

The easiest way to bookmark articles is to add a button to your toolbar in your browser by going to the tools link. The easiest being the 'bookmarklet for any browser' which in many cases just involves dragging a link and dropping it in your toolbar.

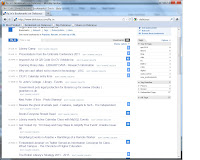
Once you have set-up your account - you can start to create your page as you would wish to. To see your bookmarks either click on "your bookmarks" to the right of the home logo, or pick my bookmarks from the bookmarks tab at the top of the page. The screenshot below (click for a larger image) shows my choice of display options. Personally I find the briefer list easier to negotiate - but others prefer more details.

Play with the various display options till you find one to suit. If one chooses the med, or high detail level, the tags will be visible in the list without the need to click on the link to see them. When tagging a page you only need to leave a space when filling in the tag line to separate tags).

The figures in the blue boxes are the number of other people who have also bookmarked that link. It can be interesting to see who else has bookmarked similar articles, and to see what tags they have given them and also what other items they have bookmarked. Your tags will also appear ot the side of the page, and you can put them into bundles of like items (my husband's hobby is flying model aeroplanes - hence the plane tags!). Tagging is of course optional but can be handy for retrieval. Bookmarks can be shared by Twitter, E-mail or delicious itself.

It is worth looking at Emma's excellent instructions from last year's Cam23 programme for more information.

If you would like to see how various libraries make use of delicious, have a look at this article from the Library Journal "Tags help make libraries del.icio.us". Although from 2007 and so somewhat dated, the list of links to libraries using delicious is worth accessing to see how this tool has been used in libraries.

Diigo

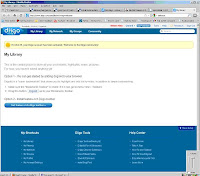
Diigo is a similar tool to Delicious . This is how Diigo compares the two tools. Signing in is simple enough - then you just need to wait for the e-mail before activating the account. Again there are a number of ways of accessing Diigo - either downloading it, or the more basic option of dragging the button to your toolbar.


The basic option limits the applications you can use - however one can still bookmark a page, highlight sections and add 'sticky notes'.- more infomation and their video tutorial can be seen here . After that it is worth looking at the features in the Help Center at the bottom of the page - Take a tour - research, share and collaborate.

Readitlater

People tend to bookmark items for one of two reasons - either because it is a useful piece of information to which they wish to refer to again and again, or alternatively they have been given a link to a page which looks interesting, but which they don't have time to read immediately. It is for the later use that readitlater was designed .

Firstly go to the SignUp at the top of the page (I am not choosing 'add to Firefox' as I don't wish to download it to my computer). The following page appears with more information.
The bookmarklets just drag to your toolbar and you are ready to start.


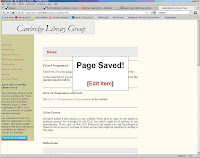
Choose a page to save and click the read it later bookmarklet.
There is no doubt that is has been saved to your list!!


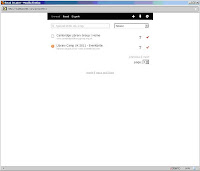
After you have save a few items click on the reading list button - your list of items will be there.
These can then either be viewed by clicking on the link of the page - which brings up the webpage, or the T which brings up a text view of the page (though thankfully even in this view one can still click on any links).
Clicking on the red 'mark it as read' tick removes it from your list. All these bookmarking tools have more features to explore, for example the ability to read the pages while offline. Some of these extra features are dependent on using the downloadable version.

For other bookmarking tools it is well worth looking at the article Phil Bradley's blog post "28 delicious alternatives to delicious"- This was written when Delicious appeared to be on the point of disappearing -and provides a useful introduction to a selection of tools .

Next time...
You will be looking at Library Thing.

Monday, 25 July 2011

Week 6, Thing 11: Reflection

Just one 'thing' this week - not a shiny online tool to play with, not a download or a widget in sight - but a chance to catch our breaths, to catch up and to meet up.

Whether you're doing these 'things' for the first time or refreshing your knowledge, try and take a bit of time this week to think about how it's going.
  • What have you learned that's new?
  • What have you enjoyed about '23 things' so far?
  • Which of the things do you love/hate?
  • Which ones will you carry on using?
  • Can you incorporate the things you're learning on this programme into your (working) life?
Use your blog to share your thoughts, chat to colleagues or come along and reflect with some other 23Thingers at the B Bar from 6pm tonight.

Monday, 18 July 2011

Reflection week meet up

Hope everyone is enjoying the programme so far! Thanks to everyone who let us know their preferred dates for the reflection week meetup. The runaway favourite was Monday 25th July. The venue is B Bar on Market Passage, and I'll be there from 6pm or just before. Looking forward to seeing lots of you there!

Week 5, Extra Thing: Dropbox

How many times do you email a document to yourself to transfer it from work to home?

Or look at the various versions of a document on your hard drive and USB drive wondering which one is the most current?

Or want to send a photo or video to someone and find that the file is too big to email?


Google Docs are a great way to share documents with others - or to access the same material from different computers but sometimes you want to keep your file formatted exactly as it is.

This is where Dropbox can be useful. It provides you with a secure online storage space so that you can share files and access them from different machines.


Getting started with Dropbox

1. First step is to go to the Dropbox website, set up an account and download the program, ideally onto each of the machines that you use regularly.
Once downloaded, the little blue Dropbox icon sits in the taskbar at the lower right-hand corner of your screen. You will also see a My Dropbox folder sitting among the folders on your machine. (By default it places itself inside the My Documents folder but you can move it.)

2. Drag or save folders or files into this Dropbox folder just as you would any other folder.

3. Now go to another computer. If it has Dropbox installed, log in and you'll see your files in the My Dropbox folder. If it doesn't, log into the Dropbox website and the files are there.

If you change the file, it's automatically updated for wherever you next look at it.
You can also use Dropbox on various mobile devices.

Sharing files with Dropbox

There are two types of sharing - using shared folders and using the public folder.

Shared folders
You can invite other Dropbox users to join a shared folder, much as you would share a Google Doc. If one person changes a file in the shared folder, everyone sees the updated file.

Using the public folder
If you want to share a file with someone who doesn't have a Dropbox account, you simply put the file into the public folder, right-click and then click on 'Copy public link'. This gives you a URL that you can post into an email to share the link.

I find Dropbox pretty easy to use. I like having an online backup for the files that I'm working on currently and it's a handy place to save back-up copies of presentations. But I mostly use it in the library as part of our image supply service. We supply digital images to publishers that are far too large to supply via email so nowadays we mostly use the Dropbox public folder.

I have a couple of gripes about it - that each individual file has to have its own public link (so 5 photos means 5 links to click) and sometimes our customers have trouble opening the links. My biggest gripe is that it's not as good for file-sharing as the much-missed drop.io

My other major gripe about Dropbox is the relatively measly 2GB limit for a free account. If you're sharing photos or videos, that's not a lot. One way to increase your limit for free is to refer others to Dropbox. So if you are installing it, do so via this URL. That way you and I both receive an extra 250MB of storage.

I'd be interested in the comments to hear about other library uses...

Week 5, Thing 10: Pushnote and Evernote

There is a fair bit to cover this week so feel free to have a play around with these 'Things' but don't worry if you can't explore them fully!!

The problem:
When you want to comment on webpages you find that you have to have an account with them and that the comments are filtered and screened.  You also want to be able to make comments on webpages and archive them along with your own notes. 
The problem-solvers:
Pushnote is a new browser plug-in, supported by Stephen Fry, that allows you to post uncensored comments on sites across the web whether or not the site supports comments itself.  You have the ability to follow friends and read their comments and ratings as well as select to see the most popular webpages.  Pushnote was launched in January of this year and is still in beta format.  There is a facility to publish your comments to Twitter and/or Facebook and there is a set of FAQs on their website that is pretty helpful.
Evernote allows you to take notes on webpages and archive them for later consultation.  Your notes can have file attachments and be sorted into folders, tagged, annotated etc.  There is a paid version as well as a free version (limited to 60 MB/month and there is a usage bar so that you can keep track).
How to use Pushnote:

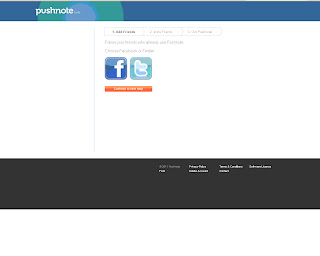
2.Create an account and choose whether you want to follow your Facebook or Twitter friends, who have Pushnote, or neither.  

3. You then install for whichever internet browser you have: Chrome, Mozilla or Safari.  (Pushnote cannot yet be used on others but this is in the pipeline). 


4. Installation is quick and easy and there is a helpful page pointing out the various features of the 'Pushnote page'.  Installation results in a star icon appearing on the top right of your screen (just under the minimise and cross buttons).  It will be green when you visit a page that has comments and red when your friends have made new comments on a page on the web.

5. Clicking on the 'Pushnote.com' at the top will take you to your account where you can make changes to your settings.

6. Now comes the exciting bit.  Go to a webpage, say the BBC homepage, and click on the star icon. This will bring up the 'Pushnote page' with references, ratings and comments of your friends. 


7.  Making a comment yourself is very easy - just fill in the box with a star rating and click on whether you want to share it with Facebook and Twitter.


8. Once you have commented your 'Pushnote page' will look like this:
So this allows us to rate and comment on pages as well as instantly access information on the webpage be it about the reliability of the product, breaking news, suggestions for improvements, interesting things people have discovered or how better to access information. 

Further reading:

This article weighs up the pros and cons of Pushnote in the business world and we can use this to think about its uses in the information sector.

How to use Evernote:

1. Go to http://www.evernote.com and have a look at their Getting started pages.

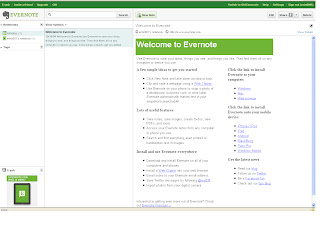
2. Sign up for an account (you will need to get the confirmation number from an e-mail they will send you) and get to the welcome page.
3.  Download Evernote according to their Getting Started pages and follow their instructions and sign in to your account.  You can create a note by clicking on New Note.  You can add URLs and tags and decide which folder to put it in.  It saves it automatically and it appears in the central panel, which you organise to view by date created, updated or title. 


4. Evernote is not just for making notes but can be used for archiving pictures from your computer or webpages or photographs taken during conferences to save you having to take notes all the time.  All you have to do is to click New Note again and click and drag a photograph from the web or your computer etc. and drop it into your new note (or you can copy and paste if you prefer).


5. You can use the View and Edit drop down menus to alter how you view your information and the Usage button along the top tells you about your monthly use.  The File menu also allows you to organise your notes and attach files etc.  Evernote for Windows or Mac will automatically synchronize your notes with Evernote on the Web every few minutes, but you can manually sync any time by clicking the Sync button.  (This means that changes you make to your Evernote account on different appliances i.e. computers, phones or mobile devices will all synchronise to keep your account up to date).


6. You can also save web content, which involves installing the Web Clipper (a quick and easy process which adds the Evernote button to your Internet browser).  All you need to do is to highlight the information you want to save and click on the Evernote button.  I highlighted a BBC article, clicked on the elephant, added tags when prompted and went to my Evernote page to find it had been filed with my other notes:


This is a really useful tool for bringing together everything that you look at on the web as well as drawing together photos, notes and text from various sources to one location, easily accessible from a variety of devices.


A bit more:

Have a play around with folders, tags, searching and how to integrate Evernote with Facebook and Twitter.

Coming up:

Why not try our Extra Thing this week which is Dropbox?!