Showing posts with label The Things. Show all posts

Tuesday, 13 September 2011

Week 13, Thing 22: Wikis

The end is nigh - hang on in there!!

We're all familiar with Wikipedia and the notion of a wiki as a website written and edited by a community.
But aren't wikis a bit 'old-hat' now? All very 2005/2006. Take a look at all the articles and talks about wikis listed on the professional development library wiki Library Success; they all date from 2005-2007. Facet Publishing have even got around to publishing a dead-tree book about library wikis.
We've got Twitter and blogs now. Aren't they the Web 2.0 tools of choice?

I think that in many ways, blogging software has replaced wikis - it's more intuitive, easier to set up and customise. But wikis can still be a useful way of storing documents that are linked in linear and non-linear ways and in enabling collaboration.

  • Wikis are really great for managing project documentation. I worked on a 4-year digitisation project which generated a lot of reports, minutes of meetings, plans and timetables. The project wiki was a great repository for all that information, enabling all members of the team, on both sides of the Atlantic, to read, edit and upload all this material at a glance. Documents could easily be shuffled around and archived. A wiki discussion was much more easily retrieved and organised than an email thread.
  • Staff Intranet Several university libraries use wiki software to manage their staff intranet. Take a look at the University of Minnesota or the University of Connecticut. The wiki operates as a content management system, combining both publicly available and restricted access documents.
  • Staff Manual If you want to produce a document with multiple sections that you'd like staff to be able to edit or comment on, with those changes being tracked, a wiki might be the answer.
  • Subject guides Have a look at this example from Ohio University. It's fine but a basic list of links like this is probably easier to put together with blogging software. Chad Boeninger from Ohio University set up a popular BizWiki guide to business-related info in 2006 and has now replaced it with a Business Blog. Take a look at both and see for yourself which is the most user-friendly.
Wikis used to be touted as interactive spaces for collaboration between library staff and users but they're pretty unsatisfactory for that. As Chad notes, he had high hopes that users would get involved and contribute content to his wiki but nobody ever did - he only had to deal with spam. There are of course issues involved in allowing open editing of a wiki. In general, users are much more likely to add a comment to a blogpost or perhaps offer a guest post than they are to edit a wiki page. It's perhaps easier to see how teachers might use wikis collaboratively, where students are obliged to contribute.

Wikis are still a great medium for archiving and publishing large quantities of documents, no matter how you obtained them.

But for the final word in deciding between blogs and wikis, what better than a presidential debate??

Tuesday, 6 September 2011

Week 12, Thing 21: Reference Management, part 2

So you've decided to take the plunge and commit to using a reference management tool. There are various questions you need to ask yourself before you start.

  • Will I mainly be working from a single machine? Or will I need to add to and access my bibliography from multiple locations?
  • Web-based or desktop program? Where is the data actually stored?
  • What kind of references will I be adding? Is it principally bibliographical material or do I want to add lots of other types of files?
  • Do I want to share my bibliography with others?
  • How much support might I need? Do I prefer support from an open source community or a proprietary manufacturer?
  • Do I envisage maintaining my bibliography after my academic affiliation ends?
Endnote
This is the principal reference management software supported by the university. It is installed on a selection of public workstations across campus but if you want to use it on your individual machine, you'll need to buy a licensed version from UCS for about £60.
It works best on a single machine. It can be combined with Endnote Web if you're away from your desktop, though you need to be careful with the syncing process.
It connects seamlessly with many major databases, particularly Web of Knowledge to import references. It integrates well with Newton and with the library's e-resources to search for full-text versions of citations via the OpenURL link resolver.
It is possible to attach files (eg PDFs, images) to bibliographic records.
It has an enormous number of output styles appropriate for different journals and publishers.

RefWorks
This is another proprietary product but one which is web-based, avoiding the complications involved with syncing across multiple machines. Both institutional and individual accounts are offered but Cambridge is not a subscriber so you would have to sign up for an individual account and pay the annual fee (currently $100).
It connects seamlessly with major bibliographical databases to import references directly.
It has a nifty RSS feed reader so that you can add feeds from publishers, for instance.
It is possible to attach unlimited files to records.
It has lots of output styles and if you don't find the one that you need, you can modify an existing one or request that one be created.
There's lots of online help documentation, including webinars.

Zotero
This is a free, open source tool which started out as an extension to the Firefox browser but is now available as an independent stand-alone application.
It also works best on a single machine, though it has recently improved accessibility from multiple locations through syncing.
Since it sits within your browser, it's very easy to add citations from webpages.
It handles multimedia items well, and has a useful archiving feature which allows you to save and annotate webpages.
It does not interact quite so seamlessly with major bibliographic databases such as Scopus or Web of Knowledge. It's often necessary to save your list of references in a format like .ris and then import into Zotero.
It can also be configured to work with CUL's OpenURL link resolver to find full-text items.
It doesn't offer quite so many output styles - but you can always request one or create your own.


Conclusion
Think about using a reference management tool if you've got an upcoming project - an article? library course or chartership?
A fuller comparison of the various options is available.
For more info on how reference management software works in a Cambridge environment, see the CUL e-resources page or the Computing Service documentation.

Monday, 5 September 2011

Week12, Thing 21: Reference Management, part 1

Sounds like a very fancy thing, doesn't it?
Obviously, as a librarian, there's nothing I like more than seeing a well-ordered, beautifully-formatted list of references but I don't necessarily enjoy the sweat and tears involved in producing such a list. That's where reference management software comes in.

It's worth knowing about some different programs in order to help students or researchers who might find them useful for essays or dissertations but it's also worth thinking about projects within the library for which such tools might come in handy. We've used them in the Parker Library to organise a bibliography of works citing our manuscripts. And we're planning to set up another database of works produced by Fellows and alumni of the College.

I'm going to look at three different programs that you might want to try: RefWorks, Endnote and Zotero.

But first some basic points common to all of them.

There are three elements to using the software: input, organisation and output.

1. Input: These days this is rarely about manually typing entries into fields of a database. It's more likely that you'll want to import references directly from
  • bibliographic databases such as Scopus or Web of Knowledge
  • online sources such as Google Scholar
  • a .txt file, perhaps from a saved search
  • a library catalogue
  • an RSS feed
  • another reference management tool
These references might be of many different types - not just the bibliographical details for books, articles, reviews and abstracts, but also webpages, audio files, news stories.

2. Organisation: You'll want to store the references in folders, tag, index or search them.

3. Output: There are two main types of output: in-text citations, footnotes or endnotes and stand-alone bibliographies. Generally the reference management software interacts with your word-processing program and saves you having to type in the full references. What's particularly useful for academic writers is that you can instruct the software to output the information according to a particular stylesheet. This can save enormous amounts of time and make copy- editors at journals and publishers very happy.

The keys to success with reference management software are selecting the right one for your needs, getting to know the features that you'll need and then making sure you use it. It does take a little time at first to find your way around but it will save you oodles of time in the long run...

Tomorrow I'll have a look at the questions you need to ask yourself before choosing a program and run through some of the main features of the three frontrunners: RefWorks, Zotero and Endnote.

Tuesday, 30 August 2011

Week 11, Thing 19: Slideshare

The problem
You've made a great Powerpoint presentation (for a conference perhaps) and now you want to share it with the world.

The solution
Slideshare is a presentation hosting website, allowing you to upload your presentations or videos which can then be shared. To get started go to http://www.slideshare.net/ and create an account:
  1.  Click on "Sign up" or follow this link, then fill in the registration form. (Alternatively if you have a Facebook account and are happy to log in to Slideshare using this, just click "log in with Facebook")
  2. The next screen will probably be an advert for Slideshare Pro, the paid service. Skip this, the free service provides all the features we need right now.
  3. Now upload your first presentation! Lots of file formats are supported, including Powerpoint formats, Keynote, Open Office, pdf, mp4, avi, and wmv. After skipping the advert for Pro, you should see this box:
If you don't see this, click on the orange "upload" button at the top of the page and this will bring you here. Although it gives you the option to upload either a private presentation or a public presentation, the private upload is a Pro feature so if you click on the blue button you will just get an invitation to upgrade to Slideshare Pro. 

Click on the orange button and upload a presentation or video. While the file is being uploaded and converted you can give it a name, description and tags:
Once the file has uploaded you can then share it on Twitter, Facebook or email, embed in your blog or simply stick the link wherever you want to share it.

Of course you can also browse Slideshare to find interesting presentations by other people. Try searching for "libraries" or "social media" or whatever else you're interested in!

Other things you can do with Slideshare
  • Favourite the presentations you like to save them to your Slideshare account (the favourite button is on the bar along the top of each presentation). Or, if the author has allowed this, download them to your computer.
  • Upload an audio mp3 file to create a "Slidecast" (once you have uploaded your presentation go to "edit" and then the "Create Slidecast" tab. This could be used in a similar way to screencast-o-matic to create instructional slides with a voice over.
  • Import a presentation from Google Docs here.
Try uploading a presentation (it doesn't have to be long or particularly spiffy) and either sharing the link or embedding it on your blog. Have a browse of the other presentations on Slideshare and share anything interesting!

Week 11, Thing 20 - Prezi

Ok, time to get creative! By the end of this Thing you will have been introduced to Prezi as an alternative to PowerPoint. You will also have some hints and tips on what not to do to make a good Prezi.

What is Prezi?
Prezi is a free online programme that you can use to make presentations. In some ways it is like PowerPoint, and, in any situation where you might consider using a PowerPoint, you can create a Prezi instead. What makes Prezi so good though is the extra capabilities it has, that can take your presentation beyond the boring 'slide with text, next slide with text, slide with text and a picture' format of most PowerPoints.

Let's get started.
Go to Prezi, and click 'sign up' on the top right. You'll need to create a free account to use the programme.

When Prezi opens, there are three tabs at the top of the page - 'Your prezis' will display all the presentations you have created. 'Learn' offers tutorials on using Prezi, at both a basic and more advanced levels. 'Explore' allows you to view other presentations on all manner of subjects - a great way to get an idea of how Prezi can be used (and perhaps what not to do as well).

To start your first presentation click the 'New prezi' button on the top left of the 'Your prezi' tab. You'll be prompted to give the presentation a title, and a description, but these can be changed later, so don't worry too much.

You'll then be offered a number of templates to choose from. I would advise not selecting any of these until you have mastered the basics of Prezi, and know the effect that you are trying to create. So select the blank template.

Prezi will offer you a tutorial - it isn't very long, and is quite useful for the basics, so have a watch and then get started.

Now click on the canvas and type to get started. You can add pictures (try using Flickr with Creative Commons licensing), and you can link to YouTube videos.

The tools can take a little bit of getting used to, particularly sizing and the animation. And be aware that your first attempt is likely to be fairly poor - mine certainly was! So practice a bit if you like it before trying to use Prezi for a presentation. The biggest tip is perhaps not to get too carried away with all the features you could use, particularly with the animation - don't underestimate the ability to create a rather seasick effect.

Rather than reinvent the wheel, have a look at this Prezi from The Wikiman (@theREALwikiman) which gives a good video demo: http://prezi.com/_sto8qf_0vcs/the-how-to-make-a-great-prezi-prezi/

Something more advanced
For a good longer presentation you can watch the one below, which you may have seen at the libraries@cambridge conference in January: http://prezi.com/if9wccvvunup/escaping-the-echo-chamber/

Like Prezi?
If you think you might use Prezi, as you work for an academic institution you can upgrade to the academic use version of Prezi for free. This allows for more privacy options for your presentations amongst other things.

Monday, 22 August 2011

Week 10, Thing 18 : Reflection Week

Reflecting at the Faculty of Classics


Well done everyone for reaching week 10 and the second of three reflection weeks. Or as I like to think of it a chance to catch up on those things still waiting to be done.  As we are well over half way through now you will all have developed or still be developing your reflective style.  The 23 things programme asks you to use and reflect on a number of web 2.0 tools.  You may not even have realised you were reflecting as you went along so in many ways thing 18 is already accomplished.  You will have been asking some of the standard reflective practice questions such as why am I using this, what have I learned and how will I apply it. 

You may choose to add the thing 18 tag to one of your other blogs where you have already reflected or write a separate post, perhaps on
  • what you have gained from this programme so far (it doesn't have to be a specific thing but more general)
  • which thing you particularly liked or disliked
  • which of the forthcoming things you really can't wait to try (the things are listed here)
If you would like to share your reflections with other people on the programme, ask a burning question on one of the things or just meet for a drink and a chat then come along to the University Centre Grads Cafe tonight at 6pm for an informal get together.

This is a reflection/catch up week rather than a blog on reflective practice but if anyone is interested in more information on this then there are plenty of links and information at the cpd23 blog post.  

I started with a photograph of the glass doors of the Faculty of Classics.  This seemed an appropriate image as it showed a reflection and part of the motivational Euripidean quote on the door.  The full quote can be translated as "happy is the man who has gained knowledge through inquiry" (Fragments, translated by Christopher Collard and Martin Croop. Loeb Classical Library, no. 504, p.227, fragment 910).  So by the end of this programme you will all hopefully be ecstatic from the new knowledge that you have gained!

Next week
You will be learning about the presentation tools slideshare and prezi as well as an extra thing on data visualisation.

Monday, 15 August 2011

Week 9, Thing 17 : Podcasts

A podcast is a pre-recorded audio or video broadcast that has been published on the web. It can be subscribed to and downloaded via a RSS feed to your media player or PC.  Lots of people have created podcasts ranging from tv shows, interviews, lectures, library inductions, commentaries and just about anything you can think of on any subject.  One of the reasons for their popularity is that users are subscribing to the content they want and if they subscribe to a series then new content is automatically downloaded so they do not have to keep checking back for updates.  

Still unsure then check out the following video on podcasting in plain English by Common Craft  :


Where do I find some podcasts?
Podcasts can be listened to and or watched via your PC or downloaded onto your ipods or MP3 players.  If you use iTunes then check out Apple's iTunes store for lots of free podcasts.  Radio and tv stations also create podcasts, for example the BBC, and there are numerous directories such as Podcast Alley to help you locate podcasts in your area of interest.

Libraries and podcasts
More and more libraries are using podcasts to create audio tours of their library or to promote new services and introduce staff. A search on 'library' at Podcast Alley had over 150 results of library related podcasts. Some UK examples include:

University of Aberdeen's induction podcasts
CILIP Communities podcasts
The British Library's Lecture, talk and event podcasts

Creating a podcast
This blog is not going to go into a step by step guide on how to create a podcast, especially as I have never made one, but for an audio podcast you just need a microphone and the software to create the file.  Hopefully before the Cam23 2.0 programme ends, Classics will have produced a podcast introduction to our collections which we will share with you, including how we did it.  Some of you in the screencasting Thing may have created audio/video files that you made available on your blogs.  These may serve the same purpose as a podcast for one off events.  The University of Cambridge runs training on using the Camtasia software (available on the pwf) for creating video tutorials if you are interested in exploring this area further.

Streaming Media Services
Although the definition of podcasting refers to files that are subscribed to and downloaded, many of the video and radio podcasts are watchable without a subscription and, in the case of such sites as YouTube and the Cambridge Streaming Media Service, you can just search for a video and watch it direct.  Not all the content is officially podcasts but loading a video in such a high profile area may lead to people seeking out your podcasts if you develop a series on your library.  Plus there is some fun stuff out there!


The University of Cambridge's streaming media service includes interviews, tutorials and lectures for viewing or downloading.  The service will also host files for departments, institutions and colleges within the University releasing space on your own servers.  Choose the 'institution' tab at the top to see a list of entries including Cambridge University Library and their how to use the widget guide.


On YouTube there are any number of library related videos.  Here are some (old) favourites:

Nice Spice : Study like a Scholar


Cookie Monster pays a visit to the library - where are the cookies?


 Goggle Vision : using electronic resources


Introducing the L-Team - let your users know who you are in a memorable way!


What to blog about?
Time to blog about podcasts. You might want to comment on how you think you might use podcasts in your library or some of the useful podcasts you have seen created by libraries.  Is a podcast just a marketing tool or can you use it to add value to your services for your library users? Or just have some fun watching some of the library YouTube videos and let us know if you find any that you think are effective.

What next?
There is an extra thing this week on Creative Commons licensing and then next week is another reflection week (or, as I am sure you all like to think of it, a catch up week). 

Thanks to Andy Priestner for the ideas from his original podcasting blog last year for the Cam23 Things programme.

Monday, 8 August 2011

Week 8, Thing 15: LinkedIn

As mentioned in thing 14, the other Thing this week is another social networking site - LinkedIn.  The site now has over 100 million users and, although not as well known as Facebook, is becoming more prolific.  It is designed to be a professional rather than a personal network.  It is popular in the business sector and with a growing number of librarians.  As with Facebook, you set up a profile which includes your employment and professional interests and then you make connections (add friends in facebook terms).   It is advised that you connect with people you know or have business links with rather than just anyone.  This is so that you build up a professional network of people.

Using LinkedIn
It is possible to view public profiles and open group discussions without joining LinkedIn, although if you want to see a full profile or contribute to a discussion then you need to become a member.  Many of the discussion groups are closed unless you are registered.

Check out some of the following Cambridge librarians and CILIP discussion group on LinkedIn to see if you are tempted to join:

CILIP Group
Colin Higgins (St. Catharine's College)
Ange Fitzpatrick (Judge Business School)
Libby Tilley (English Faculty)
Iain Shaw (Academic Services Librarian, Cambridge University Library)

To join go to http://www.linkedin.com/ and fill in the join box. You can fill in as much or as little of your profile as you wish as you can always come back and edit it later.  But remember this is your professional profile and you want to project the right image, after all you may be connecting with future employers.

When you look at your page in the top right your name is written and if you hover over this you will get a drop down box that allows you to change your settings.  From your profile page there is a search box where you can enter names or from the drop down list choose groups to search for some library groups.

Once you join a group, such as CILIP or the Cambridge Library Group, you can follow and contribute to discussions.  This is a great way to network with other people in the profession.

Not sure if LinkedIn is for you then check out this article on How are people really using LinkedIn?.

More social networking?
Just as you thought it was safe to go back into the social networking water, having mastered twitter, facebook and LinkedIn, along comes a new one - Google+.  Check out Phil Bradley's blog to learn more about it and why librarians need to be on it.  Also on Yahoo news there is a review on why G+ is more about cloud based computing rather than social networking. It includes a link to the slideshow by Vincent Wong, using G+ photo viewer, that tells us what G+ is really all about .  Google+ seems to be a mixture of Facebook and twitter, plus more, as you invite people on and connect directly or just follow them within circles that you create.   I have put below a screenshot from an account I set up to test the waters.  If you are logged onto your google account (e.g. gmail, calendar etc) then G+ will appear on the toolbar as well for easy access.


What Next
After reviewing LinkedIn then why not try out Google+ and blog about the different social networks.  You could think about what you might get out of them professionally or for your library.  Do you think you will maintain a presence on them all or just choose one? If so which one and why.

Remember to look out for the extra thing this week on media sharing sites.

Week 8, Thing 14 : Facebook

This week we are looking at social networking sites with Facebook and then thing 15, LinkedIn. Unless you have been living in isolation for the past few years, then I am sure you will have heard of Facebook even if you don't use it.  According to their website it now has over 500 million active users and you may have a personal account already, especially if you graduated in the last few years.  It is a an easy place to share information and photos with friends or colleagues. If you want to create a personal page then connect to Facebook and follow the sign up procedures.  For this thing I am going to be concentrating on how you might use Facebook in your library rather than personally.

Should libraries be on Facebook?
In the past there has been debate over whether libraries should be on Facebook as it is seen as a social space.  In 2009 Katharine Widdows from Warwick libraries published an article called "In your Facebook, not in your face" on the reception of their facebook page, which was supported by the students.  For some years now Facebook has allowed the creation of pages for businesses or organisations and it has become a major marketing tool.  It could be argued that libraries should promote their services where their users are and if that is on facebook then the library needs to be there.  Unless libraries choose to pay for marketing then it is a passive presence. Your page is there and if your users want to follow you they can.  

How are libraries using Facebook?
If you have a facebook account and search for "libraries" you will see the collection of groups and pages set up by libraries from a range of sectors and countries.  Libraries are using facebook for a variety of reasons including :
  • Advertising events
  • Promoting new or existing services
  • Tie ins with special days e.g. Valentine's day or anniversary of Shakespeare's birthday
  • News updates on closures, borrowing, electronic access etc
  • Links to articles of interest to the library users
Check out some of the examples below (you don't need to have a Facebook account). You will see that both the look and styles are very different.  You can be as creative as you want.

Orkney Libraries and Archive
Green Library Stanford
The Open University
Essex Libraries
University of Worcester ILS
Swansea University Library and Information Services
De Montfort University Library  (access to subject guides etc from left hand toolbar)

Some Cambridge Pages:
MML Library
Pembroke College Library
English Faculty Library
Judge Business School Library Services

Instructions on setting up a library page
Now you have been inspired by the pages you have viewed, you may want to set up a library facebook presence.  A few warnings.  Once set up remember to go into the edit page to check your settings are what you want.  Privacy is not such an issue on fan pages, more to do with whether you want people to be able to post to your wall or whether you want to restrict it to just you.  Remember that facebook is constantly changing its layout and settings.  For example, organisations used to have a group page but now groups are less popular and fan pages are used.  If you make a lot of changes to the appearance of your page this may have to be redone when new layouts are introduced centrally.

So here is what you need to do:

1.  Connect to facebook and on the opening screen ignore the sign up boxes and go down to the bottom right and click on "create a page for a celebrity, band or business" - that is you! 

2.  You are then given a number of options to choose from.  Select company, organization or institution (or whatever you think is most appropriate). 

3.  Depending which option you chose you will get offered slightly different boxes to fill in.  I will follow through with the company, organization or institution option.  You are asked to choose a category and then a name.  For category you might choose education or university.  Then enter your name. This will be the title of your page so think carefully how you want to be represented. Then click on "get started".

4.  You are then asked if you have a facebook account already and if not you are asked to create one.  For our library page we used our library email address rather than a personal one to create the account. You may want to decide how you want to register the page so that it may be maintained even if staff leave.

5.  Nearly there now.  Next you are asked to upload a profile picture.  This can be changed later if you haven't got any good pictures to hand.  All pages now have space for 5 pcitures on the top so make sure you add some later.  Once uploaded continue onto the next page where you are given options to collect some fans straight away.  There is also a box to share the message on your wall, untick this
if you linked to a personal account and continue.

6.  Enter your library web address and write a few things about your library so that potential fans will be able to identify your library.  Continue through for your page.  The page will give you more options for gaining fans and in the top right is the edit page button if you want to change any settings or delete the page.  In the toolbar on the left you can click on "wall" to start posting to your page. 

7.  Finally you just need to make sure you keep posting information and you let your users know you are out there.  Once you have 25 fans you can go into "edit info" under the title of your page and choose a username.  This then provides you with a shorter, more memorable url for your page. So why not get some of the Cam23 people to become fans and then when you have enough you can get a shorter url for publicising to your library users.  

What now?
Time to blog about thing 14.  You may want to blog about your own library page and its benefits or the pros and cons of having a page.  Perhaps you are setting one up and you could blog about what you hope to get out of it.  Or just blog about some of the pages you have found and why you like them or what you would have liked to have seen on them.  

If you are stuck for ideas on what to put on your facebook page try the following article on 25 Great Facebook Page content ideas.  It is aimed at business but there are some good general tips.  Another interesting article is on the growth of Facebook-commerce and how the platform is being used to sell stuff.  Perhaps a future option for library merchandise or subscription services?

Monday, 1 August 2011

Week 7, Thing 13: LibraryThing

Welcome to Thing 13!


After completing Thing 13...


You will have explored LibraryThing and understand how it can be used by libraries, and you will have created a LibraryThing account and added some books to your catalogue.


What is LibraryThing?
LibraryThing is an online resource, which allows users (libraries and/or individuals) to easily catalogue book collections, add reviews and interact with other users who have the same books and interests. LibraryThing was launched in August 2005 and currently has over a million users and over 61 million catalogued books. The resource is free to use for the first 200 books and then a small donation (suggested $10 per year or $25 for life) is required.

How does it work?
You can add a book to your LibraryThing catalogue by entering the title, author or ISBN. LibraryThing then searches a number of online sources (including Library of Congress, 690 library catalogues and Amazon) and retrieves the book's data. This data can then be edited e.g. if you want to add your library's shelfmark number.

How can libraries use LibraryThing?

  • Small libraries can use LibraryThing to catalogue their collections, removing the need to invest in a more expensive piece of cataloguing software.
  • Libraries can create a LibraryThing widget to display new or featured books on their website.
  • Libraries can integrate LibraryThing data (tags, recommendations, reviews etc) into their existing catalogues. (A list of libraries that have already integrated data is available here.)


Some background reading


1. Read Social networking for bookworms and LibraryThing and the library catalog: adding collective intelligence to the OPAC.


2. Look at the following examples of libraries using LibraryThing:


Central Science Library (Cambridge)


Nuffield College Library (Oxford)


Step-by-step instructions: Creating an account
1. First of all decide whether you're going to create a personal LibraryThing account or one for your Library. (It's probably wise to consult with colleagues also on the Cam23 programme as to who will have the honour of creating your Library account otherwise you may end up with multiple LibraryThing personas!)


2. Go to the LibraryThing website and click on 'Join Now'. Enter the username (member name) and password you want to use and select either 'personal'or 'organization' as the type of account. Although it's optional, LibraryThing advises that you also enter an e-mail address as this makes it easier to retrieve your password if you forget it. (N.B. If you do enter an e-mail address you can edit your profile to hide this from view.) Click on 'Join Now' again.


3. On the next screen you'll see an image of a book cover and you'll be asked to enter some information from the cover to confirm that you're a real person and not a machine - a LibraryThing version of verification codes! Your LibraryThing account will now have been created and you should be on your 'Home' page.


4. Next edit your LibraryThing profile. Under 'About you' you could enter a mini biography, your location and your Twitter ID. You may also want to add a photo (under 'Pictures'), choose to hide your e-mail address and opt not to receive automated e-mails from LibraryThing (under 'Account settings'). All of the fields are optional so you can enter as much or as little information as you wish. N.B. Remember to click on 'Save changes' on each page ('About you', 'Account settings' etc) otherwise you'll lose the information you enter. Once you've finished editing, click on the 'profile' tab to see how it looks.


5. Now we're ready to add some books to your account. Click on the 'Add books' tab (beneath the LibraryThing logo in the top left of the screen). Enter a title, author or ISBN into the 'Search' box and then click on 'Search'. A list of matching books will appear on the right hand-side of the screen. Simply click on the title of the correct book to add it the library you're building. (N.B. If the book doesn't appear in the list, you'll need to enter it manually. Click on the 'Add manually' link beneath 'Other options' at the bottom of the page and enter the information that you have.) Once you've added a few books to your library, click on the 'Your books' tab to see a list of them.


6. We'll now edit the books' information by adding tags (subjects), further bibliographic information, reviews etc. Click on the title of one of the books in your list and then on the 'Edit book' link on the left hand-side of the screen. Add any additional information that you wish to and click on 'Save'. Repeat for the other books in your library as appropriate.


7. Blog about LibraryThing! What are your thoughts on LibraryThing? Do you think it could be used in your library? Do you know any other libraries already using LibraryThing?


Further reading


A short introduction to LibraryThing


LibraryThing for Libraries

Week 7, Thing 12: Bookmarking tools

Ever had the frustrating experience of bookmarking a webpage on your computer, only to find the next time you want to access it that you are on a different computer? This is where online bookmarking tools come into their own - here is a whistle-stop tour of a three bookmarking tools.

Delicious

Perhaps the best known is Delicious . Delicious has undergone a period of change in the last year. At one stage it looked as though Yahoo might close the service down. In fact another company AVOS has taken it over. Therefore anyone who had an account prior to 31st July 2011 needs to re-register to the new service or risk losing their bookmarks. (Hopefully this won't have an effect on this blog entry, as naturally I had to write it prior to the August 1st changeover!!). To see what can be done with Delicious it is worth reading this brief overview

The easiest way to bookmark articles is to add a button to your toolbar in your browser by going to the tools link. The easiest being the 'bookmarklet for any browser' which in many cases just involves dragging a link and dropping it in your toolbar.

Once you have 
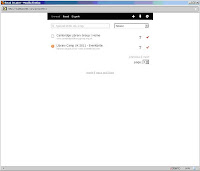
set-up your account - you can start to create your page as you would wish to. To see your bookmarks either click on "your bookmarks" to the right of the home logo, or pick my bookmarks from the bookmarks tab at the top of the page. The screenshot below (click for a larger image) shows my choice of display options. Personally I find the briefer list easier to negotiate - but others prefer more details.

Play with the various display options till you find one to suit. If one chooses the med, or high detail level, the tags will be visible in the list without the need to click on the link to see them. When tagging a page you only need to leave a space when filling in the tag line to separate tags).

The figures in the blue boxes are the number of other people who have also bookmarked that link. It can be interesting to see who else has bookmarked similar articles, and to see what tags they have given them and also what other items they have bookmarked. Your tags will also appear ot the side of the page, and you can put them into bundles of like items (my husband's hobby is flying model aeroplanes - hence the plane tags!). Tagging is of course optional but can be handy for retrieval. Bookmarks can be shared by Twitter, E-mail or delicious itself.

It is worth looking at Emma's excellent instructions from last year's Cam23 programme for more information.

If you would like to see how various libraries make use of delicious, have a look at this article from the Library Journal "Tags help make libraries del.icio.us". Although from 2007 and so somewhat dated, the list of links to libraries using delicious is worth accessing to see how this tool has been used in libraries.

Diigo

Diigo is a similar tool to Delicious . This is how Diigo compares the two tools. Signing in is simple enough - then you just need to wait for the e-mail before activating the account. Again there are a number of ways of accessing Diigo - either downloading it, or the more basic option of dragging the button to your toolbar.


The basic option limits the applications you can use - however one can still bookmark a page, highlight sections and add 'sticky notes'.- more infomation and their video tutorial can be seen here . After that it is worth looking at the features in the Help Center at the bottom of the page - Take a tour - research, share and collaborate.

Readitlater

People tend to bookmark items for one of two reasons - either because it is a useful piece of information to which they wish to refer to again and again, or alternatively they have been given a link to a page which looks interesting, but which they don't have time to read immediately. It is for the later use that readitlater was designed .

Firstly go to the SignUp at the top of the page (I am not choosing 'add to Firefox' as I don't wish to download it to my computer). The following page appears with more information.
The bookmarklets just drag to your toolbar and you are ready to start.


Choose a page to save and click the read it later bookmarklet.
There is no doubt that is has been saved to your list!!


After you have save a few items click on the reading list button - your list of items will be there.
These can then either be viewed by clicking on the link of the page - which brings up the webpage, or the T which brings up a text view of the page (though thankfully even in this view one can still click on any links).
Clicking on the red 'mark it as read' tick removes it from your list. All these bookmarking tools have more features to explore, for example the ability to read the pages while offline. Some of these extra features are dependent on using the downloadable version.

For other bookmarking tools it is well worth looking at the article Phil Bradley's blog post "28 delicious alternatives to delicious"- This was written when Delicious appeared to be on the point of disappearing -and provides a useful introduction to a selection of tools .

Next time...
You will be looking at Library Thing.

Monday, 25 July 2011

Week 6, Thing 11: Reflection

Just one 'thing' this week - not a shiny online tool to play with, not a download or a widget in sight - but a chance to catch our breaths, to catch up and to meet up.

Whether you're doing these 'things' for the first time or refreshing your knowledge, try and take a bit of time this week to think about how it's going.
  • What have you learned that's new?
  • What have you enjoyed about '23 things' so far?
  • Which of the things do you love/hate?
  • Which ones will you carry on using?
  • Can you incorporate the things you're learning on this programme into your (working) life?
Use your blog to share your thoughts, chat to colleagues or come along and reflect with some other 23Thingers at the B Bar from 6pm tonight.

Monday, 18 July 2011

Week 5, Thing 10: Pushnote and Evernote

There is a fair bit to cover this week so feel free to have a play around with these 'Things' but don't worry if you can't explore them fully!!

The problem:
When you want to comment on webpages you find that you have to have an account with them and that the comments are filtered and screened.  You also want to be able to make comments on webpages and archive them along with your own notes. 
The problem-solvers:
Pushnote is a new browser plug-in, supported by Stephen Fry, that allows you to post uncensored comments on sites across the web whether or not the site supports comments itself.  You have the ability to follow friends and read their comments and ratings as well as select to see the most popular webpages.  Pushnote was launched in January of this year and is still in beta format.  There is a facility to publish your comments to Twitter and/or Facebook and there is a set of FAQs on their website that is pretty helpful.
Evernote allows you to take notes on webpages and archive them for later consultation.  Your notes can have file attachments and be sorted into folders, tagged, annotated etc.  There is a paid version as well as a free version (limited to 60 MB/month and there is a usage bar so that you can keep track).
How to use Pushnote:

2.Create an account and choose whether you want to follow your Facebook or Twitter friends, who have Pushnote, or neither.  

3. You then install for whichever internet browser you have: Chrome, Mozilla or Safari.  (Pushnote cannot yet be used on others but this is in the pipeline). 


4. Installation is quick and easy and there is a helpful page pointing out the various features of the 'Pushnote page'.  Installation results in a star icon appearing on the top right of your screen (just under the minimise and cross buttons).  It will be green when you visit a page that has comments and red when your friends have made new comments on a page on the web.

5. Clicking on the 'Pushnote.com' at the top will take you to your account where you can make changes to your settings.

6. Now comes the exciting bit.  Go to a webpage, say the BBC homepage, and click on the star icon. This will bring up the 'Pushnote page' with references, ratings and comments of your friends. 


7.  Making a comment yourself is very easy - just fill in the box with a star rating and click on whether you want to share it with Facebook and Twitter.


8. Once you have commented your 'Pushnote page' will look like this:
So this allows us to rate and comment on pages as well as instantly access information on the webpage be it about the reliability of the product, breaking news, suggestions for improvements, interesting things people have discovered or how better to access information. 

Further reading:

This article weighs up the pros and cons of Pushnote in the business world and we can use this to think about its uses in the information sector.

How to use Evernote:

1. Go to http://www.evernote.com and have a look at their Getting started pages.

2. Sign up for an account (you will need to get the confirmation number from an e-mail they will send you) and get to the welcome page.
3.  Download Evernote according to their Getting Started pages and follow their instructions and sign in to your account.  You can create a note by clicking on New Note.  You can add URLs and tags and decide which folder to put it in.  It saves it automatically and it appears in the central panel, which you organise to view by date created, updated or title. 


4. Evernote is not just for making notes but can be used for archiving pictures from your computer or webpages or photographs taken during conferences to save you having to take notes all the time.  All you have to do is to click New Note again and click and drag a photograph from the web or your computer etc. and drop it into your new note (or you can copy and paste if you prefer).


5. You can use the View and Edit drop down menus to alter how you view your information and the Usage button along the top tells you about your monthly use.  The File menu also allows you to organise your notes and attach files etc.  Evernote for Windows or Mac will automatically synchronize your notes with Evernote on the Web every few minutes, but you can manually sync any time by clicking the Sync button.  (This means that changes you make to your Evernote account on different appliances i.e. computers, phones or mobile devices will all synchronise to keep your account up to date).


6. You can also save web content, which involves installing the Web Clipper (a quick and easy process which adds the Evernote button to your Internet browser).  All you need to do is to highlight the information you want to save and click on the Evernote button.  I highlighted a BBC article, clicked on the elephant, added tags when prompted and went to my Evernote page to find it had been filed with my other notes:


This is a really useful tool for bringing together everything that you look at on the web as well as drawing together photos, notes and text from various sources to one location, easily accessible from a variety of devices.


A bit more:

Have a play around with folders, tags, searching and how to integrate Evernote with Facebook and Twitter.

Coming up:

Why not try our Extra Thing this week which is Dropbox?!

Week 5, Thing 9 : Google Docs

Thing 9 is your chance to create a document online and share it with other cam23 2.0 colleagues via Google Docs.  You might be thinking "why would I want to do that?". Watch the video below for some of the reasons why Google Docs is useful:


Google docs is particulary helpful if you are working on a collaborative project with colleagues outside your library.  You can put up a document and share it with the others. All of you can edit it and there is just the one version rather than lots flying around via email. Also if a file is large (e.g. a powerpoint with lots of images) you don't need to worry about size limits on email accounts.  The cam23 2.0 organisers made use of Google Docs to plan this programme and update the information centrally.


Google Docs may also be used as a place to just store some files, especially if you are working across sites or want to access some files at home but can't get onto your office network.  Instead of moving everything about on a flashdrive you can save it up on Google Docs and, as long as you have access to the internet, you will have your files. 


How do I get started using Google Docs?

1.   Go to Google Docs and sign in with your Google account email and password (or set one up if you don't have one - you don't need to have a Gmail account you can use any email). 

2.   Click on Create New under the Google Docs logo  and choose either a document, presentation, spreadsheet, form or drawing.

3.   Depending what type of document you chose you will get a different work area. Enter your text and use the toolbars to help you format and save your work.  When finished just close the window to return to the Google Docs home page where your file should appear under modified today.  For more information check out the Google Docs help.


4.   If you have created the file on your PC then instead of clicking on Create New, just click on Upload and then Files and find the file you want to upload.  You will also see a settings option which allows you to confirm if you want your files converted to a Google docs format or not.


5.   You are now ready to share your file.  Click on the share button in the top right corner and an option box will open.  Enter the email addresses of the people you want to share it with or make it public to the world. You have the option to allow view only or edit permissions.  The people you share it with will receive an email with a link to the document. It will also be displayed on their Google Docs home page.  A word of warning.  If people are registered on Google with a gmail rather than their @cam address then this is the email you need to enter.  

Experiment and blog about it
Even if you do not wish to share files, Google Docs is great for creating quick forms and embedding them in your web page.  You have already used one when you registered your blog for cam23 2.0.  At Classics we use it for our book suggestion form on the website, check Book Suggestions. We find it useful as we receive an email when the form has been completed and all library staff are able to view the spreadsheet that the form populates.


Why not try out a form on your Cam23 2.0 colleagues.  I quickly set up the following form finding out about your use of Google Docs. Why not give it a go by following the link and let me know what you think of Google Docs?


Now blog about how you think you might use Google Docs or have used it. 

Next time you will be trying out Pushnote/Evernote.

Thanks to Kirsty for the original Cam23 Google Docs blog.

Monday, 11 July 2011

Week 4, Thing 8: Google Calendar

I hope Doodle went well...on with the organising!


The problem:

You need a calendar, which can be accessed from any computer and can be shared with other people. 


The problem-solver:

Google Calendar is a free web-based calendar which can be shared with other people and accessed from anywhere with Internet connection. Events can be added quickly and viewed by day, week or month. It can also be integrated with other Google services, such as iGoogle, and imbedded in web pages and blogs.

A lot of institutions already have Google Calendar on their web pages to keep their staff, students and followers.  Libraries such as the Ul, are using Google Calendar to publicise opening hours and events.


How to use:

1. To create a Google Calendar, go to http://www.google.com/calendar/.

2. Log in with your Google ID.

3. Your new Google Calendar will look like this.

3. Before you add any events to your calendar, go to the left of the screen and select Settings under My Calendar and then click on the General tab.  In this General section you can change the time and date formats, plus have a mini icon of your local weather displayed and choose whether to show weekends etc.
4. Click on Save.


How to add events:


1. To add an event, click on Create event on the left of the calendar (you can also select Quick add or highlight a date on the calendar (probably the easiest)).
2. Fill in the boxes for your event and add duration, location and whether you want to have a reminder at some point before the event.
 
3. Click on Save and you will be taken back to the calendar with your new event visible!


How to add your calendar to your iGoogle page (from week 1):
1. Go to your iGoogle page.
2. Click on Add Gadgets.
3. In the Search for gadgets box on the right of the screen, type in Google Calendar.

4. You want the first on the list - click on Add it now.
5. Click on Back to iGoogle and your calendar will be displayed!


Further reading

A blog on how libraries are using Google Calendar:
http://musingsaboutlibrarianship.blogspot.com/2010/04/libraries-and-google-calender.html


Using Google calendar to manage library web site hours: http://journal.code4lib.org/articles/46


A totally non-library, but very topical, use of Google Calendar! http://blog.artesea.co.uk/2009/12/world-cup-2010-google-calendar.html


Optional extra

How to share your calendar with someone else:
1. Under the My calendars section on the left side of your calendar home page, click on the drop down menu next to your e-mail address and select Share this calendar. 
2. You will be taken to the Share this calendar section.
3. Type in the e-mail address of the person you would like to share your calendar with and their details will appear automatically underneath (note: this person must also have a Google Calendar too otherwise you won't be able to share it!).
4. Set the Permission settings you would like this person to have.
5. Click on Save.


Next time...
You’ll be getting to grips with Google docs or why not try this week’s ‘Extra Thing’ – adding a library books feed to Google Reader and Google Calendar?!